How to use Microsoft OneDrive when your mac HD is Case Sensitive
How to use Microsoft OneDrive when your mac HD is Case Sensitive
As a Unix user since 1990 I know that file systems should be case sensitive. So whenever I get a new Mac, I make sure to set it up with a case sensitive filesystem. After doing this with my Microsoft supplied Mac, I was a bit surprised to learn that the Microsoft OneDrive macOS client does not allow you to place your OneDrive folder on a case sensitive volume, nor on an external volume.
No worries!
I was able to create an APFS case insensitive volume internal and put the OneDrive folder there.
Part 1: Create the Volume
-
Start Disk Utility
-
In the left navigation pane, context click (right click)
Macintosh HD - Data -
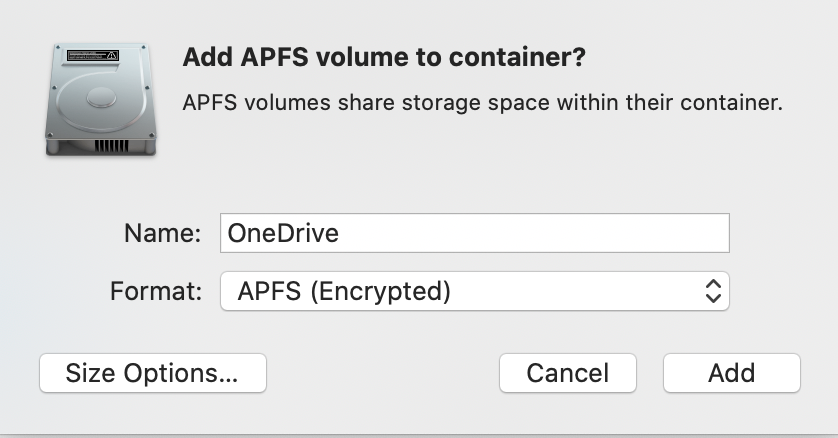
Choose “Add APFS Volume…”
-
For Name choose
OneDrive -
For Format choose APFS or APFS (Encrypted). I chose Encrypted for added security.

-
Click “Size Options…”. Choose an appropriate size. I chose 2GB for Reserve and Quota Size. Click OK.
-
Click “Add”.
-
Click “Done”.
Part 2: Connect OneDrive
-
When you start OneDrive on the Mac, it should prompt you to “Set up One Drive”. Go through the login procedures, which may include two factor authentication.
-
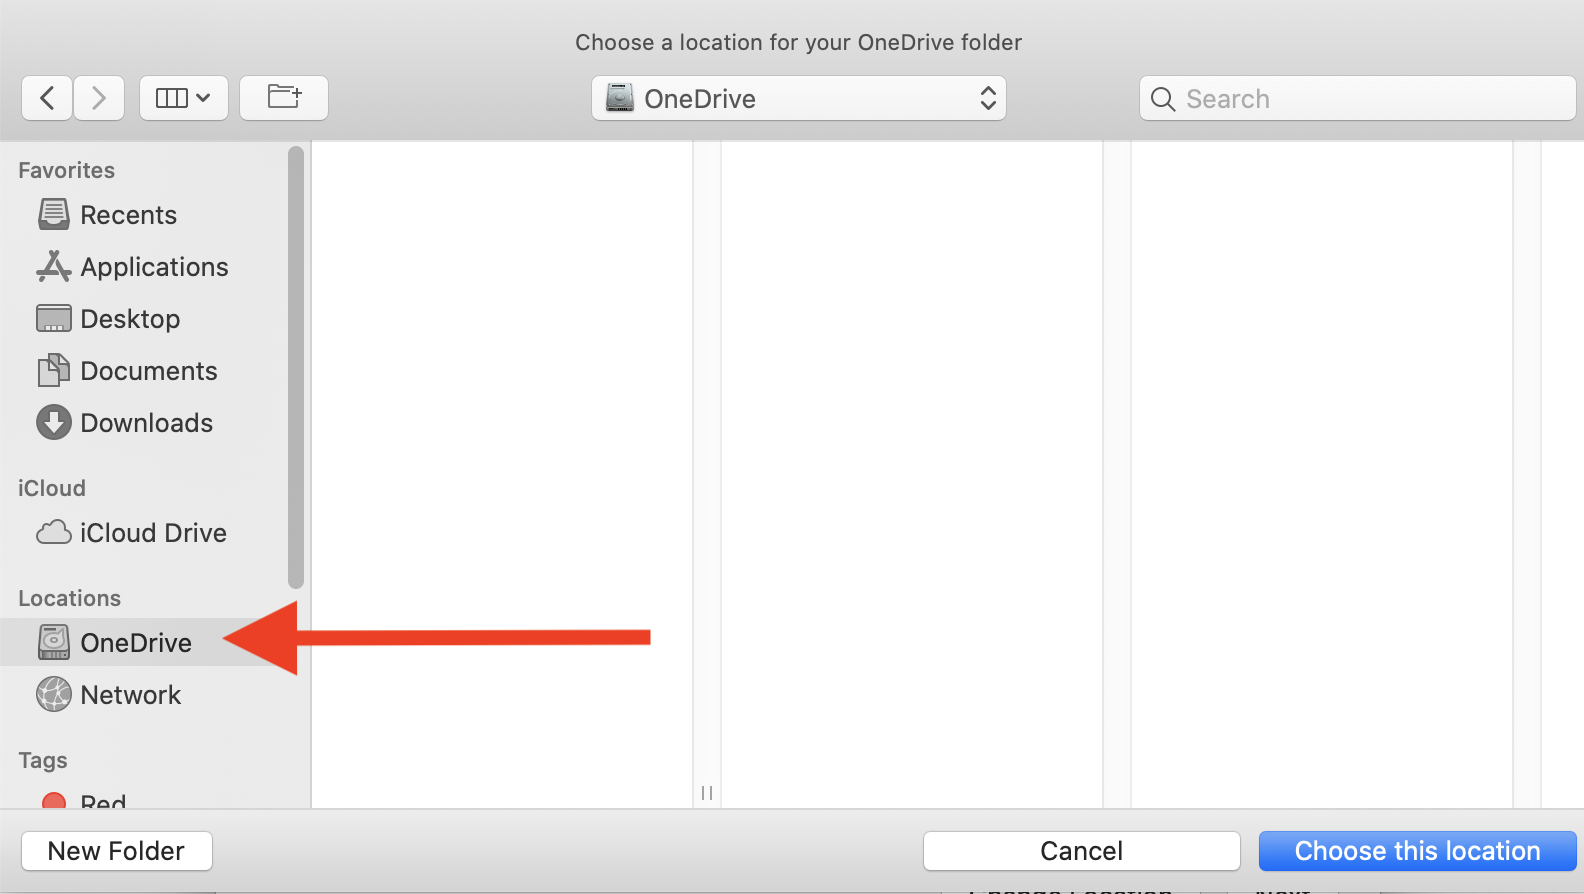
When you get to the “This Is Your OneDrive Folder” page, click “Change Location”.
-
In the file browser that pops up, choose “OneDrive” then click “Choose this locatin”, as shown here.

-
Click “Next” then click “Next”.
-
Then click “Open my OneDrive Folder”.